 ToDo Task Manager allows you to view and change the task details on the edit task screen. Clicking on a task in the task list view opens the edit task screen.
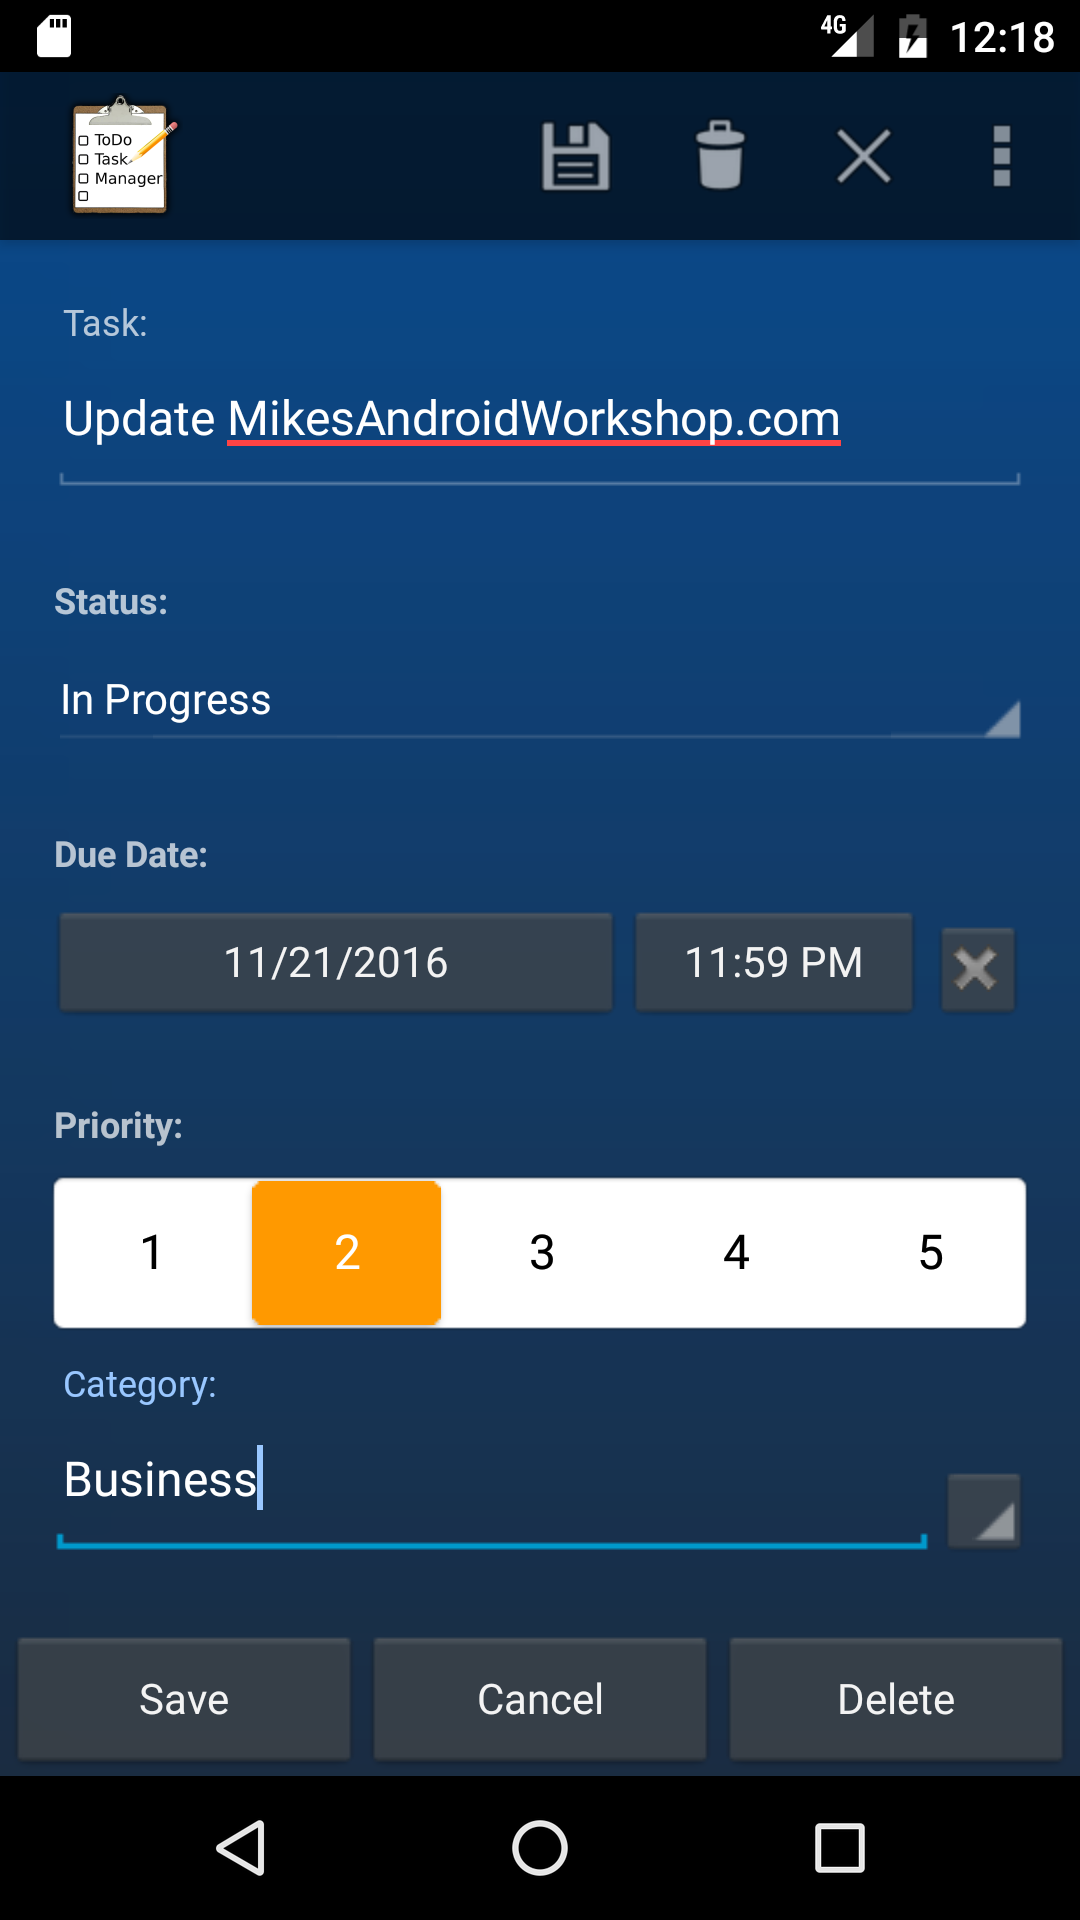
The Edit Task Screen opens in the Default Layout. You can view additional fields by changing this layout. To change the layout press the menu button and then selecting view. Then select one of the available layouts. The next time you open the Edit Task Screen it will remember which layout you used and open to layout that was used the last time the screen was closed.
Default Layout Fields:
- Task Title – This is a short description of what you need to accomplish.
- Category – This field is used to group you task together into general projects. ToDo Task Manager allows you to filter the task list by category instead of needing to create multiple lists. To enter new categories you need to type them in manually in the category field. Pressing the arrow button next to the category field will pop up a list of all of the categories that are been used in other task.
- Priority – This field is used to determine how important the task is. A task with a priority of 1 is the highest priority and a task with a priority of 5 is the lowest priority. You can change the priority of your task simply by clicking on the number that best describes your tasks priority. Once selected a colored box will appear around that number indicating that the priority has been selected.
- Status – This field is used to set the current status of the task. Setting the status to Completed is the same as clicking the checkmark on the task list view screen. Setting any other option for status is the same as unchecking the task on the task list view. The possible selections are Not Started, In Progress, Completed, Waiting on someone else, and Deferred.
- Due Date – This field is used to identify when your task needs to be finished. You fill in this field by clicking on the due date button. Once the button is pressed a date picker window is opened. Select the date and press the set button. Once a date is entered a delete button will appear next to the due date button. Pressing the delete date button will erase the due date.
- Alarm Notification – This field is used to remind you about this task by setting an alarm that will notify you at a given time. The field is set by clicking on the alarm button. Once the button is pressed a reminder alarm setting window is opened that allows you to set the time and date of the alarm. This field is described more in the ‘Reminder Alarms’ section.
- Repeating Task – This field is only visible if you have already entered a due date. This field tells Task Manager Pro to create a new version of this task once this task has been completed. This field will allow you to set how the next due date should be incremented once a repeating task is completed. This field is described more in the ‘Repeating Tasks’ section.
- Note – This field is used to enter any notes that help describe your task or any information needed to finish your task.
 Additional Layout Fields:
- Start Date – This field is used to identify when your task should to be started. You fill in this field by clicking on the start date button. Once the button is pressed a date picker window is opened. Select the date and press the set button. Once a date is entered a delete button will appear next to the start date button. Pressing the delete date button will erase the start date.
- Percent Completed – This field uses a slider bar to indicate how much of the task has been accomplished.
- Total Work – This field is used to indicate the total number of hours needed to complete your task.
- Actual Work – This field is used to indicate the total number of hours that have already been spent on the task.
- Location – This field is used to indicate where you need to go to finish the task.
- Contact – This field is used to indicate the name of the person associated with this task.
At the bottom of the edit task window are three buttons. The first button is the save button. Clicking on this button will save the changes that you have made and then return you to the task list view. The second button is the cancel button. Clicking on this button will return you to the task list view without saving your changes. The third button is the delete button. This button will delete this task and then return you to the task list view.
Pressing the back button while on the task edit window is the same as pressing the cancel button. The changes that you have made to the task details will not be saved.
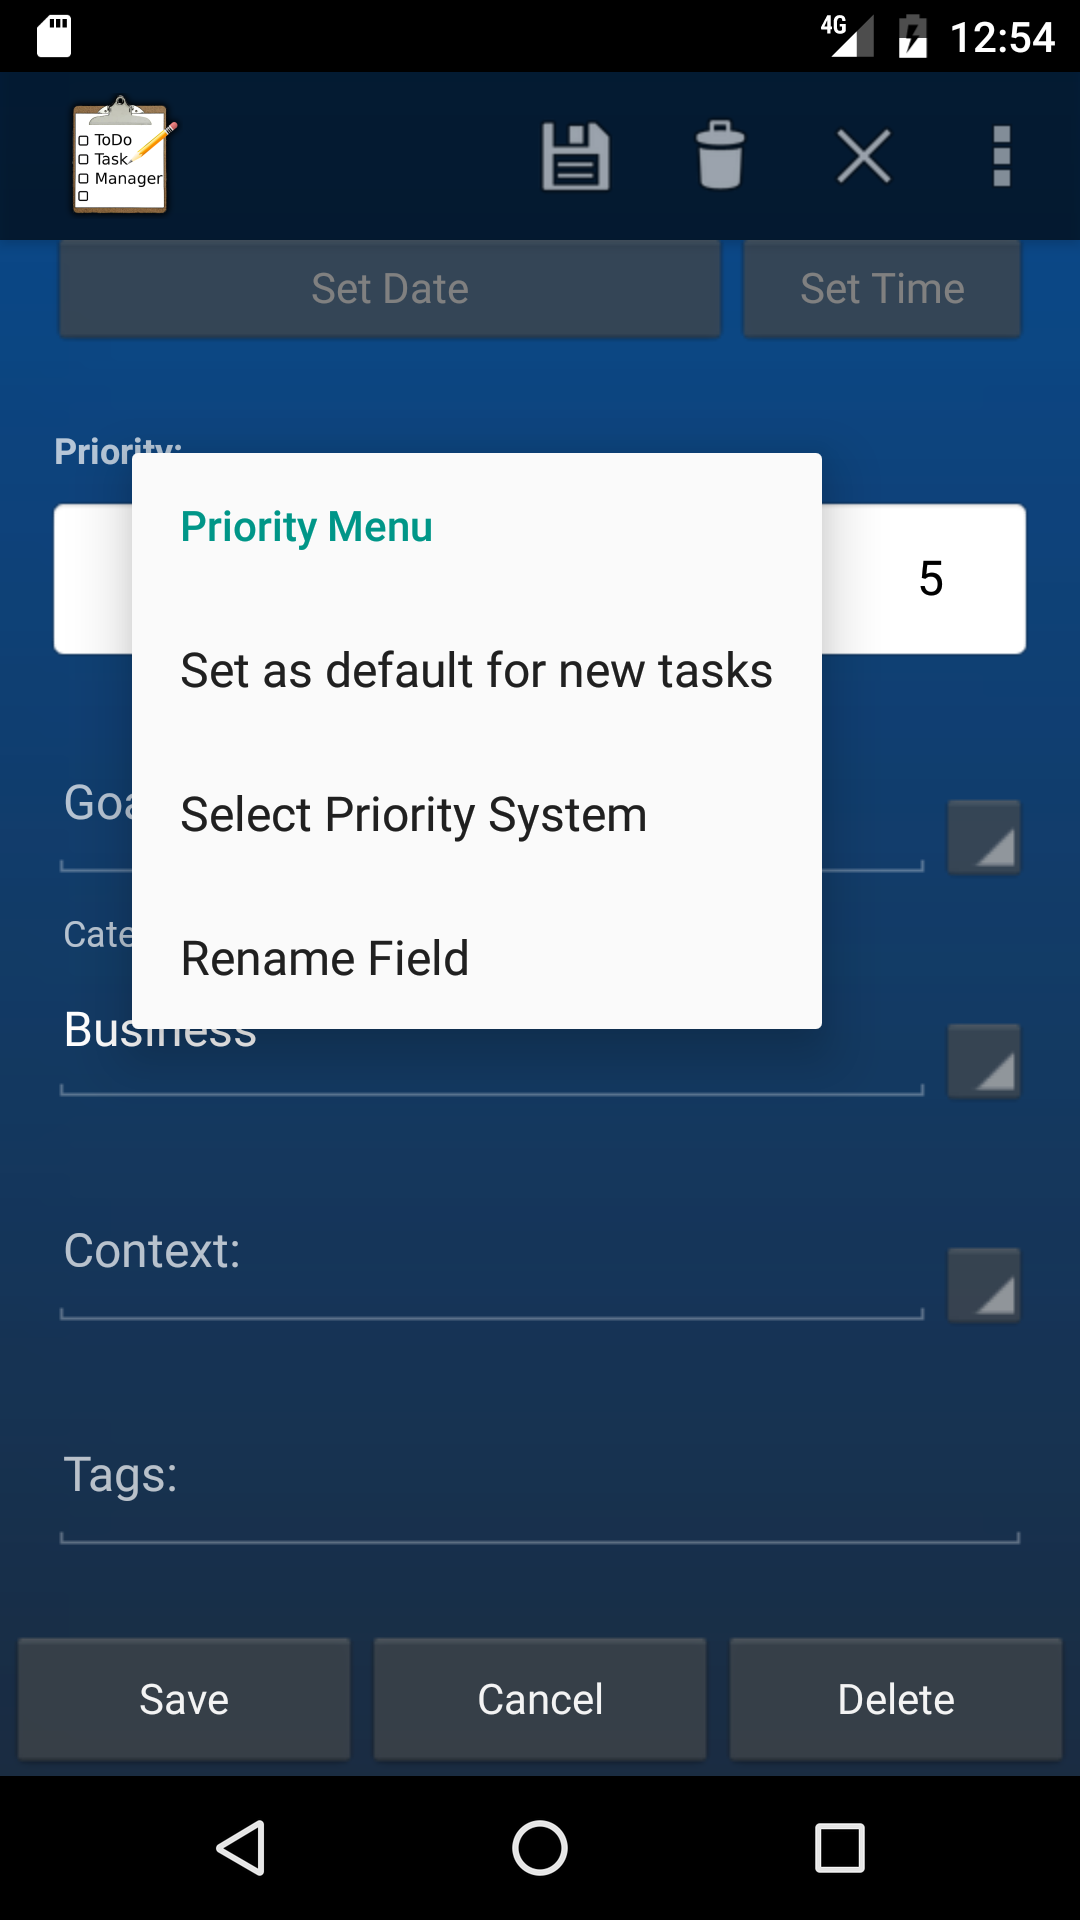 Setting the Fields Default Value:
You can set the default value for some fields by either long pressing on the fields label. The fields that allow you to set default values include category, priority, alarm, repeating task, contact, and location. The default value is only used to populate the field when a new task is created. The default values can also be set in the preference settings section.
| ← Previous | Index | Next → |