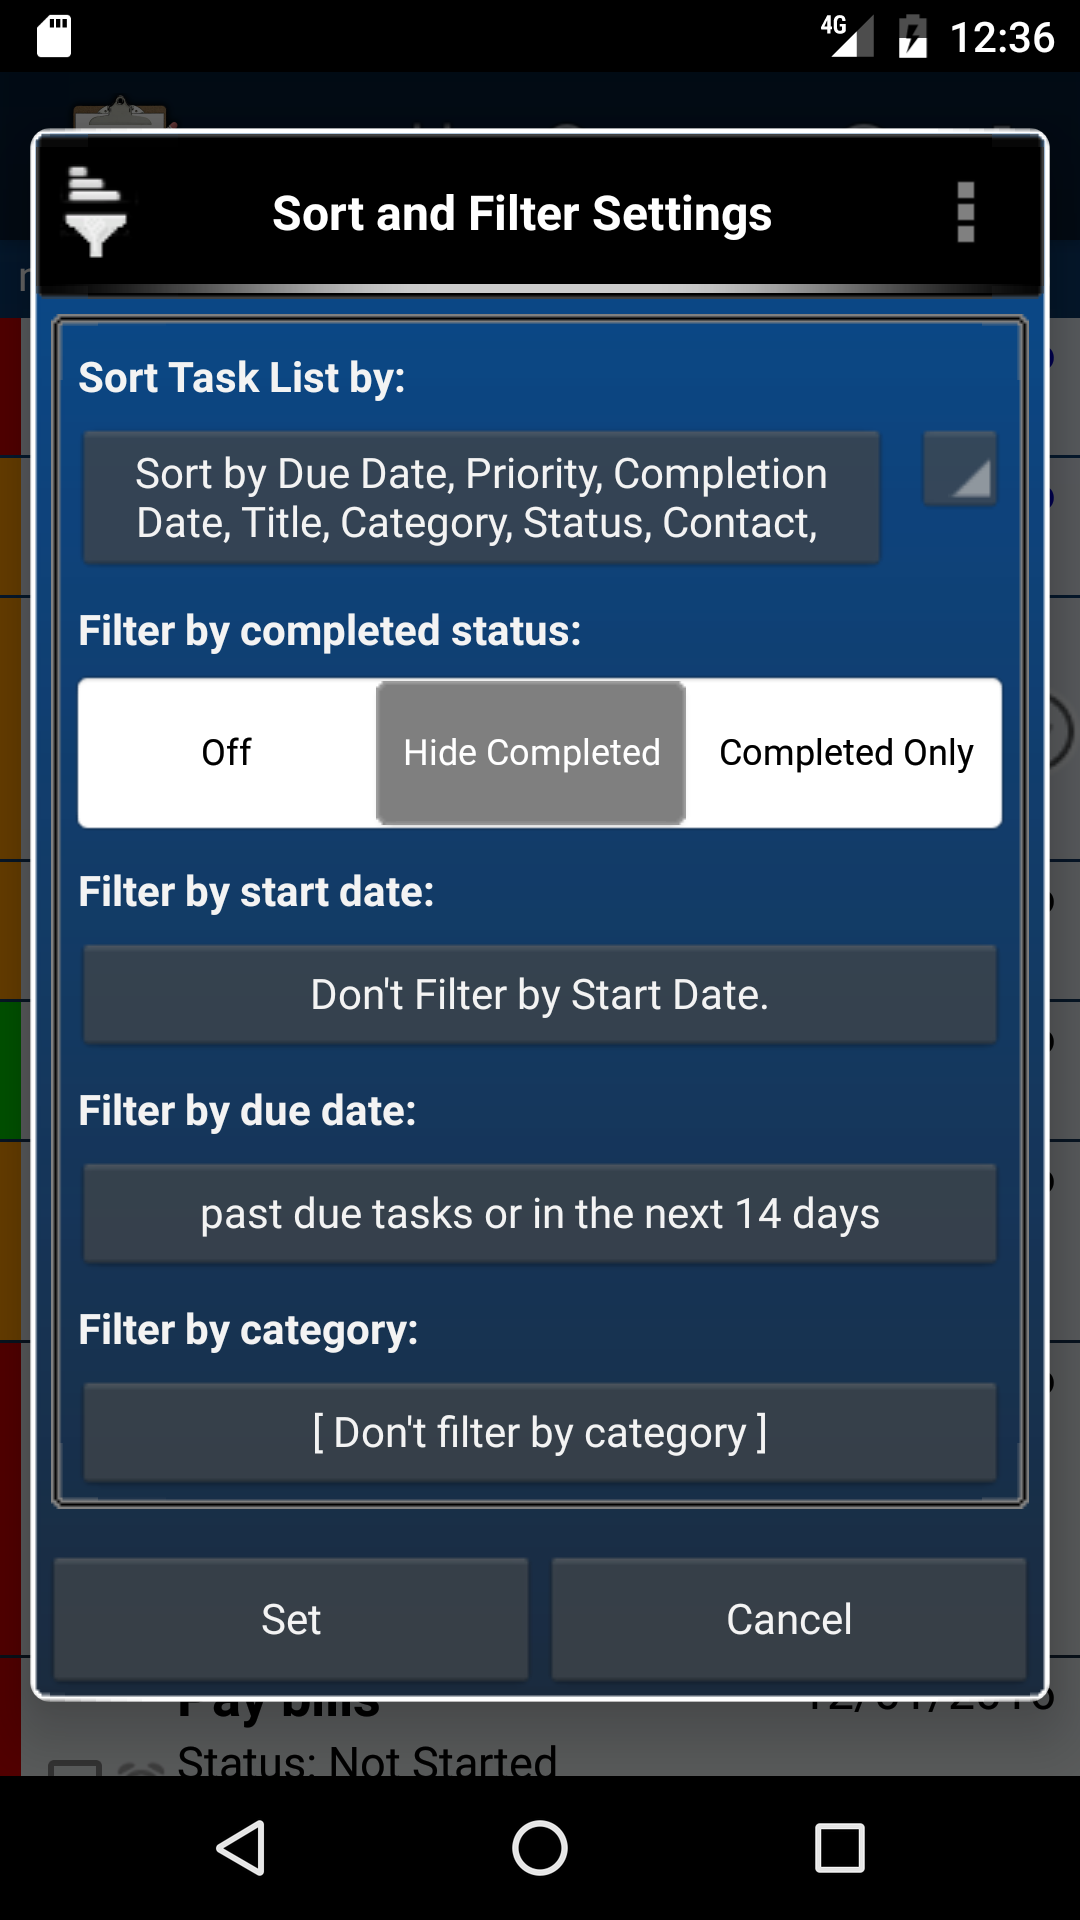
This pop up window is accessed by selecting the sort/filter menu option on the Task List View Screen and then selecting <Create Custom Filter>. It allows you to create a customized task list by select the order of your task in the task list window and filter out unwanted tasks to make it easier to find specific tasks.
- The ‘Sort Task List by:’ button allows you to select the order the tasks are sorted in.
- The Sort by completed date option will sort all uncompleted tasks by their due date and sort all completed tasks by their completed date. The uncompleted tasks are shown below the completed tasks.
- The sort by start date option will sort all tasks by their start date.
- The sort by due date option will sort all tasks by their due date.
- The sort by priority option will sort all tasks by their priority.
- The sort by category will sort tasks by their category.
- The sort by Task Title will sort tasks by their title in alphabetical order.
- The sort by updated date will list the tasks by the last time they were modified.
- The sort by status will sort tasks by their status.
- The sort by location will sort tasks by their location.
- The sort by contact will sort tasks by their contact.
The ‘Filter by category:’ button allows you to filter the task list view by categories. Only the categories that are selected will be displayed in the task list view. You can turn off category filtering by pressing the off button. This will select all categories to be displayed. Bringing up the menu options by long pressing on the black title at the top will allow you to either ‘Select All Items’ or ‘Clear All Selected Items’.
The ‘Filter by completed status:’ setting allows you to filter the task list by showing or hiding tasks based on their completed status. Selecting ‘Hide Completed’ only allow uncompleted tasks to be shown in the task list view screen. Selecting ‘Completed Only’ will only allow completed tasks to be shown. Select ‘Off’ to display both completed and uncompleted tasks.
The ‘Filter by due date:’ button allows you to filter the task view by the due date. Clicking this button will open the Due Date Filter Settings window. At the top of this window is a short summary describing the current due date filter settings.
The ‘Display Past Due Tasks:’ settings allow you to choose which overdue tasks should be displayed on the task list view screen. Select the ‘All Past Due’ option to display all task with due dates in the past. Choosing the ‘Last 7 Days’ option will prevent tasks older than 7 days from being displayed in the task list view. The ‘Today Only’ option will prevent any task with a due date before the current date from being displayed.
The ‘Display Future Tasks:’ setting allows you to choose which upcoming tasks should be displayed. Select the ‘All Future Tasks’ option to display all tasks with a due date in the future. Choose the ‘Next 7 Days’ option to prevent tasks beyond 7 days from the current date from being displayed and choosing the ‘Today Only’ option will prevent any future tasks from being displayed.
You can change the ‘Last 7 Days’ and ‘Next 7 Days’ option by long clicking the buttons. It will change between 3, 5, 7, 14, and 30 days.
The ‘Include tasks with no due date’ checkbox allows you to filter out tasks without a due date.
A possible combination include setting the sort option to ‘Sort By Priority’, setting the completed status filter to ‘Hide Completed Tasks’, and setting the due date filter to ‘Due within the last 30 days or in the next 5 days’. This will list all the uncompleted tasks with a due date less than 30 days old and no more than 5 days in the future due task and show them with the highest priority tasks first.
Using the sorting and filtering options settings is a fundamental part of this application and will increase your ability to find tasks easily and get a better overall understand of your outstanding tasks. Taking the time to experiment with these settings is well worth the effort.
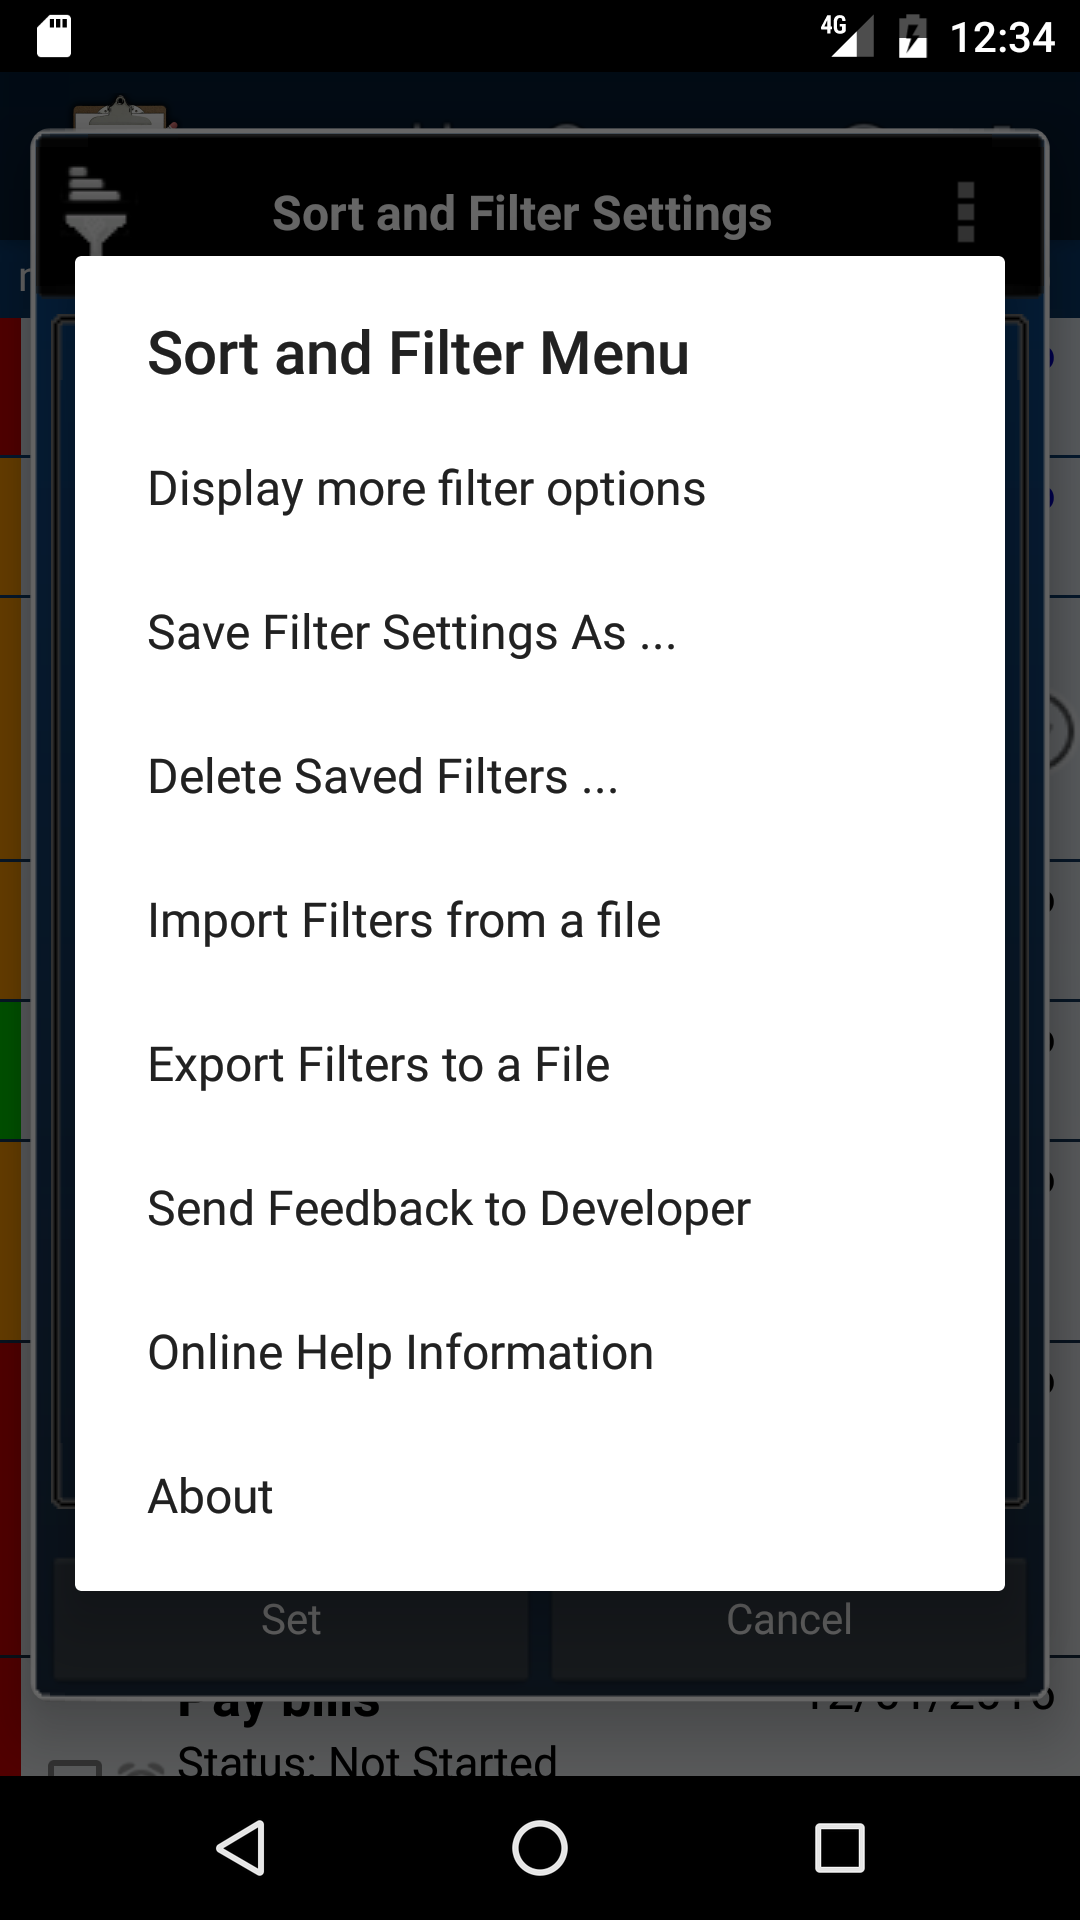
 You can save or delete custom filter settings by long pressing the black title at the top of the screen until a menu appears.
Selecting the ‘Save Filter Settings As …’ option will allow you to save the current filter settings. A popup window will prompt you for the name to be displayed on the Filter Quick Selection List Menu.
Selecting the ‘Delete Saved Filters’ option will allow you to delete any or all of the saved filters. A popup window will display a list of all of the saved filters and give you the option to select the filters that you would like to delete.
| ← Previous | Index | Next → |
